Friday

It's About Time

I can't believe I've let my blog go so long without a post. I'm sorry if you are a subscriber and are disappointed that you haven't had any new ideas from me. I have been working on several things. I'm not able to post the pics of them at the moment, but will do that tomorrow.

I was in a craft show last weekend and did fairly well. The main goal was to get more people interested in my classes and club. I had a good amount of sales and several people signed up for notifications for club and classes. I'm so happy.

I have a contract with another local boutique to provide several different stamped papercraft items. I hope they do well. I've already delivered a few items to the store and have had a call or two from customers who want to place orders.

Convention was a blast. I learned so much and made so many great projects at the Late Night Stampers Pre-Convention events. I will definitely join them next year. One really neat project was a smaller pocket folder which holds several beautiful backgrounds for Stampin' Up!'s Simply Adorned necklace line. They are just gorgeous. One in particular was a feather embossed with white EP and colored with our Watercolor Pencils. It is so pretty that I'm going to buy a Simply Adorned Charm to wear.

I had a workshop about a month ago and did well. The ladies are all very nice and get together weekly to craft. They do all kinds of different things, but they love card making especially, I may be doing some more classes for them in the future.

I'm planning on a Christmas Projects class in mid November. We'll make 4 different projects especially for the holidays. More info will be coming, so check back in a week or so.

Hope everyone has a blessed day. Here are a couple of pictures from Convention.


Saturday

Boy, have I been busy!


Happy Saturday. I've been so busy this week. I had to take my mom to radiation 3 days in a row for about 2 1/2 each day. That is rigorous and tiring--for both of us. I did get some of my swaps done while waiting for her. At home I've been working on swaps too. I plan to make about 250 items for Convention. Most will be card swaps, but I also plan to make 3D items and I'm in several different events that require me to make stuff to share.
 Last night when I was working on my swaps I discovered something neat. I stamped the star shaped flower from Flower Fest and punched it out. After looking at it for a minute I thought, "Why not?" and used the Boho Blossom punch to punch out the centers. It looks like a completely new stamped flower. What do you think?


I'm finally able to access the pictures on my camera thanks to DH. Here are the word plaques I made for my friend, Celia a few weeks ago. I think they turned out nice. She likes them a lot. Sorry the pictures aren't the best quality.


And finally, here is the graduation present I made for my son's girlfriend, Lexi. She is in Army bootcamp now. She says she loves it. She signed up for the National Guard, but likes it so much that she wants to be full time active duty.   
Hope you have a wonderful weekend filled with stamping fun.                                                                             

Friday

Stampin' Retreat

Good day everyone,

Our local group of demonstrators, INK Demos, is having a retreat this weekend. It starts Friday evening and goes through Saturday late afternoon. We are doing a shoebox swap and a regular swap of 18 + 1. I made these little gift card holders for my swap. Inside is a folded envelope that forms two pockets. One pocket is for a gift card, the other is for the note card below. I saw these online at Chicken Scratch's blog and thought they were so cute. She used "Happy Together", but since it's retiring, I couldn't use it. Anyway, I thought it was something different.

The retreat is titled "Surprise and Delight" so there are going to be surprises for all of us. Thanks so much to Jann, Leslie, Margaret & Connie for putting this get away together. It will be so nice to have my own hotel room and get away from housework for a day. I'm looking forward to all the stamping and gabbing that we girls are so good at. We are even supposed to stamp together in our PJs. Of course, I do that at home all the time. My husband doesn't understand why a bunch of grown women want to get together in their nightgowns. Oh well, men don't understand a lot of what we women do. They are easier to figure out I think. What do you think? Are men easier to understand than women? Is it easier to figure out what motivates them?


Now that the retired list is out, I've finally decided what I want to do for my Convention swaps. No peeking! I'll share them later. I have a bunch to make. I'm doing about 150 just for myself to swap. Then I have 3 shoebox swaps to do, a gift swap, a 3D swap and another swap with the INK Demos. I'm going to be one busy girl for the next 3 weeks. In addition to all that, I have to take my mom for radiation treatments for 3 days next week--she has lung cancer. Also, on Monday, I'm having the nerves in my lower back burned to try to relieve the horrific pain I suffer daily. Please pray that it works for me.

My closest friend, Celia, has 3 huge bulletin boards in her kitchen that are full of pictures. She wanted to put something decorative above them, so I made these placards for her. She was very happy. I used the retired Creamy Carmel because it's very close to one of the walls in her kitchen.

Sorry it's so blurry. I took it with my cell phone and it doesn't have the best camera around. I used the large serif alphabet dies and covered the letters with Red Riding Hood DSP. Made little flowers from Basic Black & Creamy Carmel (to cover my screw ups LOL) and mounted them as shown. I'm really happy with the way the project turned out.

Thanks for looking. Have a blessed day.

Saturday

Stamped Tiles

Greetings
Here are the tiles I made for the craft show last week. I'm very happy with how they turned out. I stamped them with craft ink and then baked them at 350 for 30 minutes. To be sure the design wouldn't fade I sprayed them with clear sealer. These are also going to the boutique.


Hope you enjoy them.

Wedding Bells are Ringing (Somewhere)

I've been making wedding cards today. Yesterday I sought advice for making a groom out of punches. The sweet gals at SUDSOL and Late Night Stampers helped me get some ideas by sending me links. Thanks girls, Anyway, here is the result. I changed him quite a bit. It's still not my ideal, but he'll have to do. I guess the perfect man doesn't exist in the paper world either!

I don't know anyone getting married, but it's June so I figured they might come in handy for the people who shop at the boutique where I'm going to sell my cards. I'm taking my first batch of stuff up there tomorrow. The cute little girl who owns the shop is only taking 20%. I think that's a good deal for a consignment store. I'm just guessing though--I've never sold anything on consignment before.

I got an email today from a woman on Meet Up who wants to come to my new stamp club--Paper Capers. There are a few others who want to come too. So this might be the real deal.  My BFF, Celia, bought some of my cards to give as a gift. She said everyone oohhed and aahhhed over them. They were also fascinated with the boxes I made for the cards! One lady wants to come buy some cards and also have a workshop. YEAH! That's what I like. I've been really busting my behind to get this business going and I'm finally seeing some fruit from my labor.

On to the cards:
The Bride & Groom: The first one is a little rough. I embossed vellum with the swirls from Priceless and then used the large scalloped circle die for the gown. Then I trimmed it to the shape you see. The groom is a combo of word label, large tag, and large star punches. The second groom has the decorative label punch for his lapels. Also, on the second card I lined the gown with Very Vanilla and used DSP from Elegant Soire. I like the second one much better.


 The next two cards have wedding rings made with the large and small oval punch & gold paper (so sad the little one is retiring) : ( I used mini glue dots to hold them together after I cut one so they could be joined. When I did the embossing with the folder the back got a little bit of embossing too. I don't know how to prevent that--do you know? Will you please tell me? Oh well, I'm not perfect and I can admit it! The second ring card uses the same heat embossed paper as the wedding gowns. I put Blushing Bride behind it. It's hard to see, but I put Perfect Pearls on top of the gold brads. I think it tones down the bright gold of the brads some.


I hope I've inspired you to make some wedding cards. I thought about making a funny card with a knotted ribbon that said " Congratulations for Tying the Knot." Maybe I'll do that tomorrow.

Have a great weekend
Alison


Sunday

Woo Hoo!

It's been a while since I posted--nearly a month. I guess I got discouraged because my blog doesn't look very good and I haven't had time to fix it.

Anyway, I made a bunch of stuff over the last few weeks for a sale at a local church, I made some neat tiles using the new Flower Fest set and Open Sea. They came out very nice. It's late and I haven't taken any pictures yet. I will post them tomorrow. I also made big magnets with the Big Blossom die--50 of those suckers. I made earrings and of course cards. I sold about $30.00 worth of stuff, which isn't much, But the big news is I made an actual catalog sale and the lady wants me to do a workshop next month. Finally, something is happening with my business. I've been busting my butt trying to get this thing off the ground. I'm so excited and will have a hard time waiting for June to pass.  My friend, Julie, knows her and says she and her friends will be a good group and I may even get a club started with them. So you know I'm saying, " Woo Hoo" all day.

The new CATALOG is coming out July 1st, so I hope you're as excited as I am, I've had a sneak peek and I know you're going to LOVE. There are several wonderful sets retiring : (. But something has to give to make way for the new. Check out the retiring list at my Online Shopping link. Those sets that are retiring will never be available from Stampin' Up! again--GET THEM BEFORE THEY'RE GONE!

I hope everyone has a blessed week and that you get a lot accomplished.

Blessings,
Alison

Happy Mother's Day to Everyone

Happy Mother's Day ladies. I hope you all have a wonderful day with your family at your side.

Yes, my blog is a mess. I had a fellow demo show me how to do some things to my blog today and she just picked whatever came up first. I will be fixing it in a few days. At least now I know a few tricks to make it look a little better.
Here is the card I made for my mom for Mother's day. I got the idea from Jackie Topia. The flower and buds are made with the wing of the bird and branch punch--I can't think of the real name right now. I think it turned out okay. Do you ever have a vision in your head and when you try to get it onto paper it just doesn't look the same? It happens to me a lot. If only I could connect a USB to my brain and get a digital copy of that idea. But then I'd be opening myself up to Phishing, Viruses, and hackers/ That is a scary thought!


The second card is one of a set of four that I made for a fellow demo who's husband has been very sick ffor several months. Our group, INK Demos, asked us to make Thank You cards for her since so many people have been giving her a hand, Of course it was voluntary but I was glad to do it.

Swap Card

                                                                   Hey all,
This is a swap card I made for our monthly INKDemos meeting. It's a group of about 40 demonstrators-upline, downline and everything inbetween. We discuss different topics every month to make our businesses better and grow. We also do a project every month. It's a great way to meet fellow demos and learn from them. Anyway, we have a 10+1 swap every month. It usually has a theme. This month the theme was to show off the embossing folders with the Big Shot. I used the Perfect Polka Dot and Square Lattice folders. For the stamp set I used Dreams Du Jour. I colored the image with markers.So, here is my swap. I like the colors together--very springy! Have a happy

Wednesday

I Love Experiments

I discovered this cool technique on SUDSOL by Nola Burkhard. It is so neat that I just had to try it, even if it is 2:30 a.m.! Anyway, it's very easy to do. You stamp a solid image stamp in the lightest of 3 coordinating colors, then you slide the inkpad along the stamp sideways to make the lines. You have to huff to moisten the ink before you stamp on the CS. I'm not fully awake, so this is the best I could come up with right now. I will definitely be playing with this some more.

Another thing I did tonight was mix Stampin' Pastels into Sculpey clay. I got an almost perfect Rose Red and Garden Green. At first I tried adding re-inkers to it--what a MESS! It became an ooey gooey blob that stuck to my fingers. I didn't wear gloves so I had re-inker all over my hands. It looked like I had been dying Easter Eggs all over again : ) Anyway, the Pastels work a lot better. I bought some molds of leaves and flowers and plan to use them on a card once I get them baked. I hope the colors don't change in the oven. 

Oh, on another front, I have a scrapbook class scheduled in May at Hobby Lobby. I'm so excited and I hope I get a good turn out. We're going to make a 20 page 6 X 6 album from a Simply Scrappin' set from last year. I thought about using the new set in the Summer Mini, but I'm only charging $15 for the class and that set is $21.95 so I would be going in the hole. It sure is a gorgeous set though and I'm going to order it for myself.

Until next time..... 

Friday

The Easter Parade


I've seen so many cute Easter items but I haven't seen an Easter Bonnet. I've been thinking about making this for a few days, but just haven't had the time until tonight. It's 3:20 a.m. and I'm ready to hit the sack, but I wanted to get this posted. I will try to get a tutorial up sometime tomorrow. I'm happy with the way the bonnet turned out. It took me a while to decide which flowers to use. I made several different types and finally chose these. I don't know what their called--maybe the Alison flower : ) Anyway, I hope you enjoy it. Check back tomorrow evening and hopefully the tutorial will be posted. Happy Easter! Remember it's the incredible Resurrection of our Lord Jesus rising from the dead that we celebrate--to give us hope for eternity.

Saturday

Flower Fancy Vintage

I made this card today. My goal is to make at least 6 different cards using this set to show the versatility of Stampin' Up! stamp sets. I have 3 others that I've made. I think I like this one the best so far. I have another that is an Easter card that I made at my upline's house last month. It's very pretty too, so maybe I like it better. It's hard to decide sometimes!
I used Baja Breeze, Soft Suede and Crumb Cake CS. I stamped the image with Soft Suede and colored in the leaves and flower with matching markers. I used Perfect Pearls as accents. They don't show up well in this scan--DH scaned it on his printer because mine is out of ink. I guess he didn't get it positioned the right way to get the pearls at their best advantage.
Something sad. A pair of wrens built a nest above our front door a few weeks ago. Mike found an egg shell on the ground this morning. Then, this afternoon, he discovered 3 tiny baby birds on the ground. They were only about an inch long. Two of them died from the fall but one was still moving so he put it back in the nest. I hope it survives. When she made the nest I was worried that this would happen. The poor little things didn't stand much of a chance in that location. It's so sad when something like this happens, it makes me want to cry.
I am meeting with a fellow demo next week to get my blog set up the way I want. I made a nice banner in MDS and also the side bars, but I don't know how to put them onto Blogger. She is really good with computers, so I hope to get everything set up just the way I want in a few short hours with her. She only charges $10.00 per hour. I think that's a great price. Next time you stop by perhaps it will be up and running.

Correction for Party Purse Instructions

On the 1" strip you should score it 1/4" from each edge, not 1/2". Sorry for the error.

Party Purse Tutorial

I made this last night. It can be used as a small gift or table favor. I'd been thinking about it for a few days and finally took the plunge. I'm happy with the result. This is my first tutorial so PLEASE tell me the truth about what I need to do to improve it for next time. Thanks for stopping by.                                                                    


Supplies:  CS Pretty in Pink (4 3/4" X 11" and 1" X 9"),
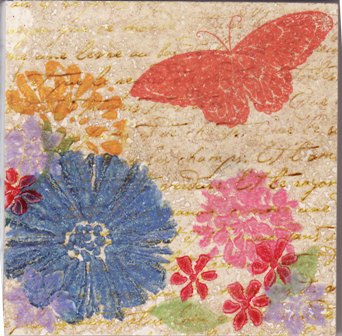
Basic Black (3 1/2" square), Whisper White (3 1/2" square)
DSP- 3 3/8" circle                    5th Avenue Floral Stamp Set
16" Organza ribbon                  16" black eyelet ribbon
Perfect  Pearls                          Watercolor Wonder Crayons
Sticky Strip                              Stampin' Dimensionals
Aqua Painter                            Coluzzle or Circle Scissor Plus
Heat Gun                                  Embossing Powder
Snail Adhesive                          Big Shot 
Scallop Circle die                     3" Circle die
Circles, Scallop #2 die              Paper Snips                          

First I cut a piece of Pretty in Pink CS 4 3/4" X 11". I scored it at 5 1/4, 5 1/2 & 5 3/4.


Next I made an accordian fold


After folding the score lines, I lined up the folded edge onto the Scallop Circle Die. I had 6 scallops uncovered. This gives a bottom to the piece. Then I ran it through the Big Shot. You can just barely see the die lines here.


This is what it looks like after being cut. Snip off the little scallops on the bottom--in between the large scallops.
By the way, YOU aren't going crazy--I used two different colors of CS while I was making this tutorial! I don't know why the grid paper looks purple in this shot??


 Next, I cut a 3" circle with the 3" die in Basic Black and used my Coluzzle to cut a 3 3/8 circle from Springtime Vintage DSP. Sorry this picture doesn't show the DSP very well. You can use the Circle Scissor Plus to cut this if you don't have a Coluzze. They retired a few years ago,


Stamp the large rose from 5th Avenue Floral onto the Whisper White using Versamark ink.


Sprinkle with the NEW Melon Mambo embossing powder. It will be available on May 1st from the Summer Mini catalog.


Use the heat gun to heat the embossing powder until it is shiny. Let it cool a few minutes before you touch it. Otherwise, it will smear and ruin your image.


Color the embossed image with Watercolor Wonder Crayons by rubbing the crayons on the image and then spreading the color with the Aqua Painter. (or use Copic Markers) Cut out the roses when you're finished coloring.


Put the colored rose onto the Basic Black circle using Stampin' Dimensionals and set aside for now.

 Take the 1" X 9" strip of Pretty in Pink and score it on the 9"side 1/4" from each edge. Then score it every 3" on the 1" side. Place Sticky Strip on all edges and in center space. That will be the bottom of the purse.


Adhere the center portion to the inside bottom of the scallop die cut. Leave the rest of the Sticky Strip alone for now.


Put the rose and black circle onto the DSP and adhere to the front scallop. Add the Perfect Pearls to each individual scallop as shown.


 Now it's time to put the box section together. Take the covering off the Sticky Strip on the edges of one side and secure to Scallop. Attach the bottom piece first, then the two sides. Be sure the sides are straight. Repeat for other side of box.


Take the Organdy ribbon and apply Sticky Strip or other strong adhesive on the center portion, running the entire length of the ribbon.


Attach black eyelet ribbon to center of Organdy ribbon as shown.

It helps to hold the Organdy ribbon down tightly with your thumb and forefinger :)

 Put 4 1/2" of Sticky Strip on each end of ribbon.  Attach the ribbon to the box starting at the bottom with about 1 1/2" (center of bottom). Continue around the corner and up to the top on one side.  


Continue to attach on other side of box, finishing at the bottom where you started. If it isn't flush at the bottom, adjust so that it will stand up. Put some weight inside to help steady it.


Here is the finished Party Purse. I put some Hershey nuggets inside, but there is room for several different types of candies or small gifts. I hope you have enjoyed this. I plan to do more tutorials in the future so please stop by again. I don't know why the actual post has so much space between the pictures. On the "New Post" page everything lined up nicely. Oh well, maybe I'll figure it out one of these days. Bye for now.